Difficulty: Easy
DIY Instructions: Using CCleaner to clean out junk files in your computer
The following instructions are provided without any warranty or guarantee. If you are not comfortable with what you are doing at any moment, contact a professional.
1.) Download the CCleaner setup file from the recommended software page.
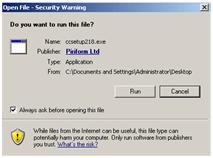
2.) After you have downloaded the setup file locate the file on your computer’s hard drive and double click on it to start the installation process. You will see the following screen…
Click run to begin the installation process…
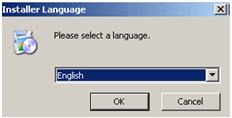
3.) Select your installer language and click OK…
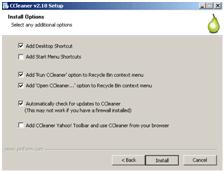
4.) Continue with the installation…
5.) Once you have finished the installation you will now want to run CCleaner
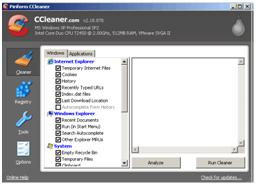
-Click Start, All Programs, CCleaner, and then CCleaner… (this will bring you to the following screen)
Once it is up and running, on the bottom right click, Run Cleaner (it will scan through your hard drive and clean out any junk files) You can run it again to make sure it did not miss anything.
Note: Depending on your installation, you may see a screen that says… This process will permanently delete files from your system. Are you sure you wish to proceed? Click Ok
6.) You will see other tools to the left of the screen which include Registry, Tools and Options. These should only be used by experienced individuals. Please use caution when working with your system’s registry.
7.) After you are finished, it is always advisable to run your system’s defragmenting program. Please see the recommended software page for a free defragmenting program.
Support Our Blog by Visiting Our Sponsors
Tags: clean,hard,drive,pc,computer,junk,data,file,cache,clear
Was this article helpful? Share it with your Facebook friends. Got anything to add? Leave a reply!
Copyright 2011 The Cyber Fusion © New Jersey


